Custom Vision is a Microsoft Service that can create a custom computer vision model based on a specific images set. This website is therefore built to help people train and deploy image classifiers for their specific needs.
What is really interesting here, is that it very simple to use ! This service works in 3 steps : upload the data-set, train the model and deploy it. Here is a little “How To” : give it a try !
1. Upload images & Tag them
First step is to get as many images as you can in order to create a good data-set. Also, you need to determine one or multiple “tags” for each one of your images. For this example, I download some photos of dotted and leopard clothes from another Microsoft tutorial. You can then download them using this script (from the same tutorial) with Python 3.
Be aware that you must have at least 30 images by tag in order for the model to be effective. But it is not the only prerequisite : The quality of your data-set is also a very important setting. Depending on the quality and the variety of your images, your final model can be very efficient – or not !
Once you have all your data, you can create a new project. Connect you to the Custom Vision web page and click on New Project (Note : you need a Microsoft Account to sign in). Choose the more useful domain for your need. If you followed my example with clothes, choose General. Select also Classification for the project type.

Once the project is created, you can upload your images by clicking on Add Images. I suggest you to upload your images by tag in order to save time. But anyway, you can change tags later on every image (Note : Follow the instructions - the website is really intuitive !).
When all you images are downloaded, you should see all of you data classified by tags.

2. Train
To train the classifier, use the Train green button (top right of the page). The training may take a little while depending on the amount of data you provided. After the training, you can now see the performance of your model :

Note : for those interested, those estimations was obtained through a k-fold cross validation (a data scientist trick). Also Precision and Recall are common metric in this field.
If you need, you can add more data and train again your model.
Also you can click on Quick Test (next to the Train button) to select you own custom image and submit it to the model. For instance, here my model give me the tag “dotted” when I expected “leopard”.

3. Deploy…
And that’s it ! When you find a correct model for your need, you can download it and deploy it as a REST Api Service !
On the Performance panel, click on the Export button. You can use multiple platform.

For our example, choose the DockerFile format (Note : this format is really useful in order to work with other Microsoft Services). You can now run the docker file as usual :
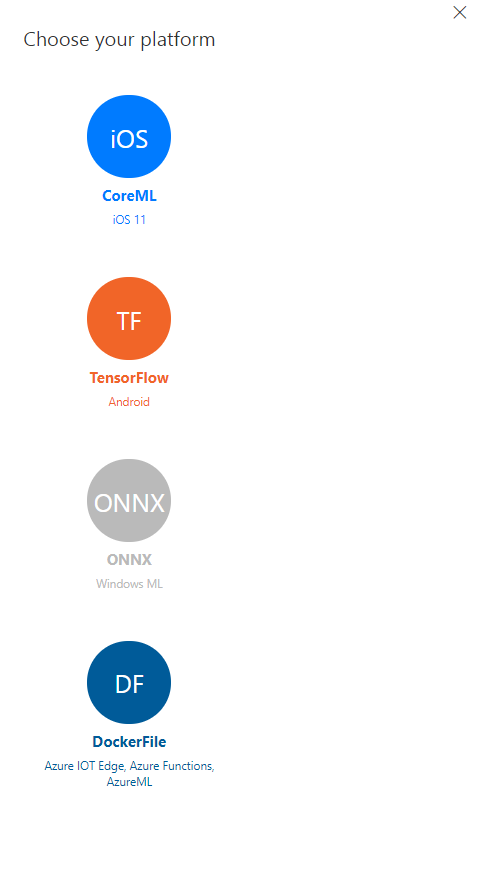
For our example, choose the DockerFile format (Note : this format is really useful in order to work with other Microsoft Services). You can now run the docker file as usual :
docker build -t
docker run -p 127.0.0.1:80:80 -d
When your docker is running, you can access the api with curl. For instance, post an image and get Json response from the model API (Note : take a look at the Readme.md of the project you just download !  ).
).
Enjoy !
No comments:
Post a Comment