Improve the Configuration of Docker Compose with Environment Variables

I recently started working on a new python project (yeah!). This project is really interesting, but the first lines of code are at least a decade old. Fortunately, this small project is relatively well designed on a Bash script and a docker compose basis. In theory, this is rather good news, but in practice, the deployment remains quite tedious.

This is because for every new configuration, we need to edit the docker-compose.yml to change some parameters (ports numbers for instance). The easiest way to manage these different parameters would be to create a docker-compose.yml file for each configuration. But in our case, we want to keep a much finer granularity where – at any time and whatever the environment (dev, prod, …) – we can change some parameters when launching all the dockers.

This finesse in the configuration of the launch of docker-compose has asked us to automate a little more the deployment of the application, through the use of environment variables. 

Environment Variables

To use any environment variable with docker-compose,  we need to use them inside the docker-compose.yml file:

services:
      my-container:
          ports:
                - “${PORT}:${PORT}”

If we prefer, we can also use this format :

services:
      my-container:
          ports:
                - “$PORT:$PORT”

With, that in mind, we are able to produce a very generic docker-composer.yml file. We can use those variables in all the file, even to configure the entrypoint script:

services:
      my-container:         
          container_name:my_container-${VERSION}
          image: “XXX.XX.XX.XXX:XXXX/my_container:${VERSION}”
          ports:
                - “${PORT}:${PORT}”
          entrypoint:
                - /local/start.sh
                - -opt1=${OPTION1}
                - -opt2=${OPTION2}
                - -port=${PORT}

Manage the environment variables with the Environment File

The first question that should come to our mind at this point is “What will happen if those environment variables are not defined ?”. Well docker-compose will pass an empty string to any variable that will not be defined. To ensure that those variables always exist, you can store some default values in an environment file : .env. Here is an example :

#./.env
PORT=8080
VERSION=1.0
OPTION1=”my first option”
OPTION2=”my second option”

Then if the .env file is in the same directory as the docker-compose.yml file, everything should work like a charm.

Manage the environment variables in the script file

Back to our specific project, we want to be able to change any of these variables quickly. In our case, our project is a little more complex than a simple docker-compose command to launch all our docker images. So, to launch docker-compose, we go through a .sh script that does a number of things before launching the dockers. Among other things, this script allows us to launch some commands like docker-compose up, docker-compose start, docker-compose stop, rm, cp, …. Since we are really lazy, we don’t want to update the .env file every time we change the configuration. So we decide to update our script to set our environment variables via parameters. This solution will allow us to launch the application with all the options we need in a single order like this : 

./myScript.sh  --port=5050 --opt1=”test” --opt2=”test-server”

Which is very simple to do inside the .sh script. All we need to do is export our variables to our local environment at the end of the script, so docker will have access to these variables :

for i in “$@”
do
    case $i in
         --port=*)
         CUTOM_PORT=”${i#*=}”
         ;;
         --opt1 =*)
         CUTOM_OPTION1=”${i#*=}”
         ;;
         --opt2 =*)
         CUTOM_OPTION2=”${i#*=}”
    esac
done

# do other things if needed…

export PORT=$CUTOM_PORT
export OPTION1=$CUTOM_OPTION1
export OPTION2=$CUTOM_OPTION2
export VERSION=”1.0”

When all those modifications are done, we just need to run our docker-compose command as usual (inside the .sh file for instance) and everything will be set-up as we want !

Give it a try, it is really cool !

Automate the Boring Stuff with Azure Resource Manager Template

If you are using Microsoft Azure Portal for your database, your web app, or any other resources, you can find useful to use Azure Resource Manager Templates (ARM templates) in order to deploy resources faster.

Those ARM templates can be run as script and can be included in a build/deployment pipeline easily. Therefore, you can quickly deploy resources for your new release, for your new development environment, or for whatever reason ! 

Here is a little tutorial to starts using ARM ! 

0. Prerequisite

Before creating a script, we need an Azure environment. Here, I will take the example of a simple Java Web App interacting with a Storage Account.  The idea is, that every time I have to deploy a new release, I need to update my application. Depending on the complexity of your system, you can use a lot of different components that are all interdependent (or not). An ARM (Azure Resource Manager) script will therefore allow you to create/update/delete those components as a whole and as many times as you want.

If you do not have an Azure account already, you can create a free one here.

For the third part of this tutorial, you also have to install Azure Cli. You can find the documentation for windows installation here.

The complete ARM Documentation is available here

1. Create the project

You can easily start by creating an Azure Resource Manager Project with Visual Studio. Select File > New Project and select an Azure Resource Group model (don't worry about the type C# or Visual Basic because it has no impact on the project)


Once you click on Ok, a popup appears to select an Azure Model. To fully understand what we are doing, select the Blank Template. But you can select a more relevant template based on your needs. 


The azuredeploy.json file is as follows : 

{
"$schema":"https://schema.management.azure.com/schemas/2015-01-01/deploymentTemplate.json#",
  "contentVersion": "1.0.0.0",
  "parameters": {},
  "variables": {},
  "resources": [],
  "outputs": {}
}

$schema and contentVersion are the current versions of the ARM script used ; parameters is where we are going to put all our parameters that we need to gives to the script ; variables is for defining multiples values that will be used in the template ; resources will content our different components ; and outputs is a specific place to specify returning values when the script as been run.

The azuredeploy.parameters.json file is describe as follows :
{
"$schema":"https://schema.management.azure.com/schemas/2015-01-01/deploymentParameters.json#",
    "contentVersion": "1.0.0.0",
    "parameters": {

     }
}

In this file, we are going to put all of our parameters values. This is very handy since it is an easy way to update our parameters without changing the main script.

2. Describe our Web App

Now that we have our blank template, we can start working ! First, we describe our web app. You can use Visual Studio by right click on resources(0) in the Structure JSON explorer and select Add Resource


Select a Web App and choose a name. If you have no App Service, you can also create it. In my example, I create a new one called "my-appservice". Then click on the Add button. 


When this is done, you should see that your script (azuredeploy.json) have been updated. We now have two new parameters, one variable, and our two resources : 


We then add in the parameters file the value for the my-appServiceName parameter : 

"parameters": {
    "my-appServiceName": {
        "value": "appServiceCreatedWithArm"
    }
}

(You can also override the my-appServiceSkuName if you want, but he is set by default to F1.)

3. Deploy your script

Now that we have created our first script, we need to run it.

Open a terminal window and locate yourself in the repository of azuredeploy.json and azuredeploy.parameters.json. You can then run the following command to deploy your script inside your <resource group name> :

az group deployment create --name <deployment name> --resource-group <resource group name> --template-file azuredeploy.json --parameters azuredeploy.parameters.json

If you don't provide the parameters file, you will have to specify the parameters values inside the command prompt.

In your Azure Portal, you can now see your deployed resources inside the resource-group you specified :


Hope this really quick tutorial give you a lot of idea in order to secure your Azure environment !


An AI on the Edge : a Microsoft Azure Story

Remember when I started by last internship four months ago ? Well, now is the time to deploy it using Microsoft Azure IoT Edge !

This is my first experience working on the Azure IoT Edge Solutions provided by Microsoft, and I have to say : this is real fun. Here what I want to achieve is to deploy my AI algorithm on “edge” devices. This process will then allow them to work disconnected from the cloud but with all the advantages of it.

Here is the architecture that I am working on :


The key of this strategy is that everything is deployed as an Edge Module in a Docker Container. Every one of those modules is autonomous and they are all able to communicate with each other through the IoT Edge Runtime (purple in the frame). All those modules can do some processing inside the device and then send their conclusion on the cloud using the Azure IoT Hub. This solution avoids a lot of messages traffic that can coast a lot of money. Indeed if my AI DCOP is in on the cloud, every device will have to send their data on it (let's say every second) which will make my system a really slow one.

What I also really like is that the system is modulate which allow me to add a lot of other process to improve my artificial intelligence. For instance, I can add to the DCOP system another AI (like a Machine Learning model) that will do some video recognition (Emotion Recognition on the frame). In some specific scenarios, we would like to add a camera in the room able to detect facial emotions, and therefore, detect when a patient is in pain.

Here, all my modules (IA DCOP, Emotion Recognition and Database) are written in Python and are running on Docker Ubuntu Xenial containers. I also add an Azure Stream Analytics that will aggregate values coming from my different modules.

To use all of this Microsoft magic, I use the Azure Portal with the Azure CLI and the Azure IoT Edge Sdk.

For those interested, I also started a little cheat sheet where I store all azure-iot-edge-runtime-ctl and docker commands that I use : https://github.com/SachaLhopital/azure-iot-edge-cheatsheet.
   

Custom Vision - A Service to Create your own Images Classifiers and Deploy it

Custom Vision is a Microsoft Service that can create a custom computer vision model based on a specific images set. This website is therefore built to help people train and deploy image classifiers for their specific needs.

What is really interesting here, is that it very simple to use ! This service works in 3 steps : upload the data-set, train the model and deploy it. Here is a little “How To” :  give it a try !

1. Upload images & Tag them

First step is to get as many images as you can in order to create a good data-set. Also, you need to determine one or multiple “tags” for each one of your images. For this example, I download some photos of dotted and leopard clothes from another Microsoft tutorial. You can then download them using this script (from the same tutorial) with Python 3.

Be aware that you must have at least 30 images by tag in order for the model to be effective. But it is not the only prerequisite : The quality of your data-set is also a very important setting. Depending on the quality and the variety of your images, your final model can be very efficient – or not !

Once you have all your data, you can create a new project. Connect you to the Custom Vision web page and click on New Project (Note : you need a Microsoft Account to sign in). Choose the more useful domain for your need. If you followed my example with clothes, choose General. Select also Classification for the project type.

 image

Once the project is created, you can upload your images by clicking on Add Images. I suggest you to upload your images by tag in order to save time. But anyway, you can change tags later on every image (Note : Follow the instructions - the website is really intuitive !).

When all you images are downloaded, you should see all of you data classified by tags.

Capture

2. Train

To train the classifier, use the Train green button (top right of the page). The training may take a little while depending on the amount of data you provided. After the training, you can now see the performance of your model :

Capture

Note : for those interested, those estimations was obtained through a k-fold cross validation (a data scientist trick). Also Precision and Recall are common metric in this field.

If you need, you can add more data and train again your model.

Also you can click on Quick Test (next to the Train button) to select you own custom image and submit it to the model. For instance, here my model give me the tag “dotted” when I expected “leopard”.

image

3. Deploy…

And that’s it ! When you find a correct model for your need, you can download it and deploy it as a REST Api Service !

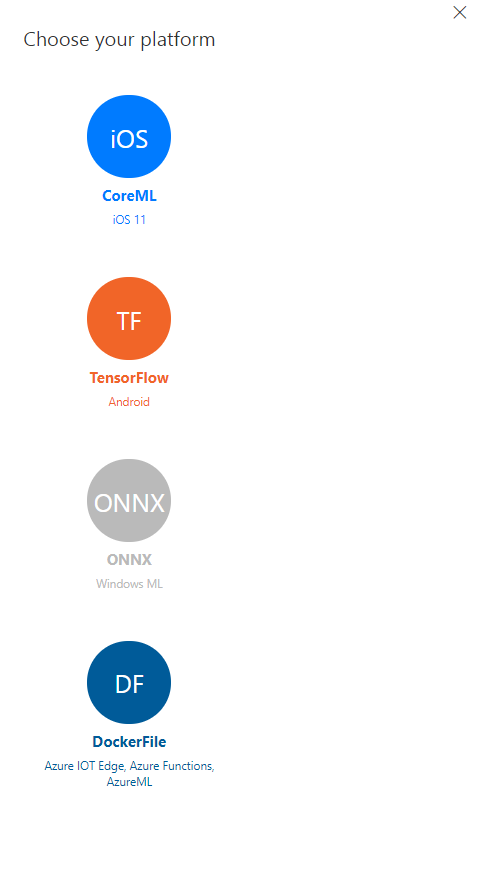
On the Performance panel, click on the Export button. You can use multiple platform.


For our example, choose the DockerFile format (Note : this format is really useful in order to work with other Microsoft Services). You can now run the docker file as usual :

docker build -t
docker run -p 127.0.0.1:80:80 -d

When your docker is running, you can access the api with curl. For instance, post an image and get Json response from the model API (Note : take a look at the Readme.md of the project you just download ! Winking smile).

Enjoy !

My First Developers Meeting as a Speaker :

Since I start my last project (Distributed AI in IoT Devices), I have to admit that I learn a lot of new things in very different fields : Artificial Intelligence, Mathematic Modelling, Project Architecture, Craftsmanship, IoT, ... This project also gives me the opportunity to experiment a lot : new language, new tools, new methods.

With that kind of experience, I soon got in touch with an association of developers : Microsoft User Group of Lyon (MUG Lyon). Thus, they submitted me to a new challenge : present my project as feedback of my experiences in front of other developers. After some thoughts, I decided to meet this challenge and to deliver my project through a very specific approach : “Are Craftsmanship Good Practices Achievable in an AI and IoT Project ?”.

Why did I say yes ?

This was a great opportunity for me to conciliate the two things I love the most in my work : Artificial Intelligence and Craftsmanship best practices.

When I start my double degree in AI, a lot of people told me that engineering and scientific are two very separate fields that are not mixable. I believe they are wrong since I did it in my current project. Indeed I currently use all of my skills (from all of my oldest experiences) to achieve this project. And I am very proud of that.

There is no reason to reject good practices just because a project involve complex mathematic calculations. Also, It allows the code to be more easily accessible from any developers : no need to be an expert in mathematics.

Last but not least, this was a great opportunity to improve my social skills and my communication capacities. I worked hard on this presentation to present this project as simply as possible, and to produce an accessible speech for anyone. Those kinds of skills are very useful to develop, and I am happy to have tested them on a real professional context.

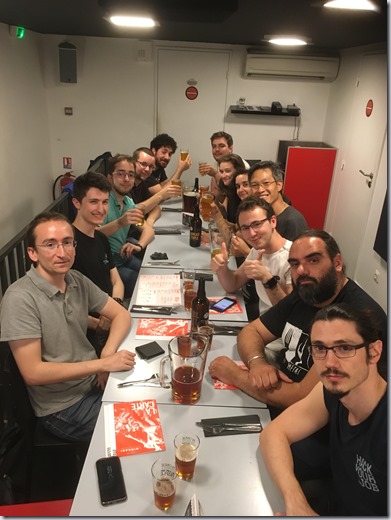
IMG_1326

Thanks the MUG for this great opportunity !

The meetup event :
https://www.meetup.com/fr-FR/MUGLyon/events/250854003/


How To “Clean Code”

A long time ago, I read the Clean Code during my first internship. Immediatly after, I started to apply the global idea hidden in this bible for developers. But this task can be quit complicated because it’s too long and the result can end up worst then before. Here are my 4 ideals that I follow in order to apply the Clean Code’s principles without getting lost.

1. Start to define what is the most urgent

The Clean Code gives a lot of little rules to apply in order to provide a beautiful and readable program : Don’t write global functions, Don’t use flags as function parameters, Functions should only be one level of abstraction, and so on… But implement all of them can take a lot of time and require a lot of practice because not all of them are that simple to achieve.
In the ocean of rules that you should use (according to the clean code), I believe that it is important to focus on just some of them at the beginning. The benefit is to achieve a more readable code quicker than expected but also to transform your “most important” rules in automatism faster. 
In my own case, here are my “most important” rules that I focus on every day :
  1. Every element of the code should have a meaningful name (file, variable, function, class, …)
  2. Max indent per method should be 2 or 3
  3. Use Constants
  4. Don’t Repeat Yourself
If you noticed, those rules only take care of the readability of the code itself. But choosing to first focus on those do not mean that I don’t try to apply the other rules. It is just my priority.

2. SOLID is difficult, but Single Responsible Principle is the key

The SOLID principles are kind difficult to achieve, especially when the project is big. (Know that the Dependency Inversion Principle gives me nightmares !)

If there is one that is the most important and the easier to use, it surely is the Single Responsible Principle : a class or a function has one and only one responsibility. Refactoring my code this way helps me achieve a more readable code quickly. This is also very convenient for testing. 

3. Don’t lose your mind

This is important for me because I am a perfectionist. But clearly, provide a perfect code is not possible.
First, because it requires too much time.
Secondly, because I can see a code has perfect, meanwhile my coworkers will still be unable to read it. It is my own perception of it.
Finally, because sometime, splitting the code too much makes it unreadable.
Even if refactoring is good, I try not apply each rule literally, because it can have the opposite effect.

4. Don’t forget tests

Last, but not least, you need to clean the tests !
They can be read by any developers to and it is not that hard to refactor them as well. It will be then easier to solve failed test afterwards ;-) .

Et Voilà !

I gave you all of my tricks to help me write better code. Of course it is just my way of doing it, so feel free to adapt those advices to your own situation.
Now, will you excuse me, I have some refactoring to do.

BDD - My Own Specification Sheet

I like to say that I don't have very much time ahead in this project, since my internship is only six months long. On one hand, this short time is not an excuse to skip tests. But on the other hand, I can not spend most of my time writing them. A good alternative for me was then to do some behavior-driven development tests.

Behavior-Driven Development test method allow me to test really important features without making me test every single line of my code. This method helps me create a minimal code that answer a specific need.

To use this method with my Python code, I use behave. Behave is a framework similar to cucumber that allow me to merge my specifications and my tests. This is really powerful since I can now show my tests results to anyone in my project : everybody can understand what is working, and what is not.

Here is a little illustration.


First, I describe my feature just like behave wants me to. I do it myself since my project is specific for my internship, but it can be written by an analyst, a customer, or whoever in charge of those scenarios.


Then, I - the developer - can assign the scenario to the right tests using specific behave tags : @given, @when and @then. It can seem quite annoying to separate those 3 steps, but everything can be store in the context. Also it makes every step reusable for multiple tests !

Behave also provides a lot of different features that can create very particular tests like the concept of "work in progress" scenarios or the use of some step data if needed.

Finally when I run those tests, results are shown in a very understandable way :


Note that the path following the '#' indicate the location of the method associate with the step. It is really useful for refactoring the code and still be able to fix failed tests.


How I Make My First P.O.C

Everything is going really fast since the start of this project. But after only two months of hard work, I start the development of (kind of) the Proof Of Concept (P.O.C) !

I will not explain here what is a Proof Of Concept or what is it for, but I will try to explain how I proceed in my very specific case.

1. State of the art

Since I consider a DCOP algorithm as part of my solution for a long time, I first reviewed a lot of different algorithm, trying to find the best one for my project. I take a look on ADOPT, DPOP, even some specific ones like CoCoA. Finally, I choose the DPOP algorithm (Dynamic Parameters Optimization Problem) which gives me more advantages :
  • It is one of the fastest in the execution time. It is always a nice advantage.

  • All agents are ranked with a DFS Tree which allow agents to organize themselves during the process. 

  • Also, the DPOP algorithm is a 100% decentralized method since all agents executes the same code : there are no “intelligent mediator” to manage them. This is really convenient since the system does not rely on a central process.
Coupled with this research phase, I made my own inquiries about the medical field, and more precisely, nurses work. My objective was to gain enough information about their process to define a clear purpose for my project. And to do so, I needed to understand their needs.

2. Mathematical aspect

With this first step, I define the main goal of my system :
Avoid syringe pump to ring without involving nurses too often”
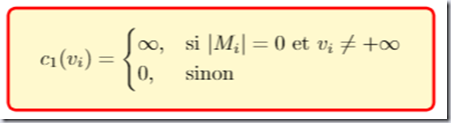
Now that it was said, it was time to start the tough part : I needed to translate my constraints in a mathematical language in order to transcribe it inside the DPOP algorithm. This is required because the algorithm optimize constraints through a (mathematical) minimizing function. Therefore, I need to describe my constraints as functions. Above are some examples.  
image
For Mi = {m1, …, ml} the set of devices linked to the agent i, if the agent has no devices, then there is no need to call the nurse.
image
This next function transcribe the following constraint : If two agents are in the same geographical area (= they are neighbors), they can eventually synchronize themselves in order to avoid two interventions in a t_synchro laps of time.
To understand those functions, notes that vi is the hypothetical time that remains before the next nurse passage in the room. For instance, if vi = 5, it means that the next passage of the nurse is encouraged in the next 5 minutes. Thus, the algorithm try to find the best vi affectations for each agent i of the system depending on those constraints (by trying to minimize their results).  

3. Hands on keyboard

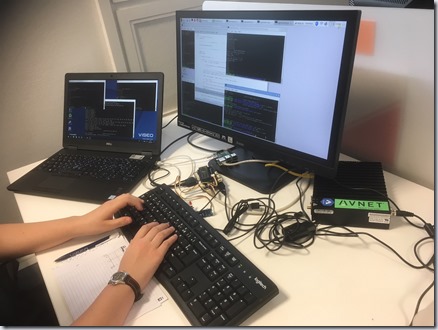
With those constraints, I finally start to code ! Here is a photo of the current installation.
IMG_1046
I am working with two raspberry pi : each one of them is an agent – which mean that my DPOP algorithm is running on both of them in the same time.
I also have an AVNET Linux server which run a “server” specific code. This process is here to give a kind of Let’s go! signal to all agents. This Let’s go! allow all agents to start the DPOP algorithm in the same time. This is just for implementation. Maybe I will remove it later, when my agents will be more advanced.
For those who are interested, I code this algorithm in Python 3, and my agents/server are communicating with an MQTT Protocol.

3 Things That Inspired Me After #SIdO18

The 4th and the 5th of April 2018, I attented a french IoT Showroom : the SIdO in Lyon. At this occasion, I was able to fall deeper in the IoT World, and the place of the Artificial Intelligence in it. Here is 3 breaknews that I will try to keep in mind :

1. AI & IoT to upgrade our process


Nowadays, Lean Management is a well known method in the industry. It surely helps a lot of companies in their development and in their organisation. But we are now at the beginning of the 4th industrial revolution. This leads to the creation of  “smart factories” over the Internet of Things.

Following that path, it appears that every company is now on its way to the 4.0, but no one has anything concret to show yet. This disability to run projects in production shows a problem in the analysis phase. The new services that those projects will create needs to be considered wisely. The key here is to focus on concrete uses cases that will give real benefits to consumers. This is a trending topic : even in the industrial world, all is about "services" rather then the product itself (customers prefer to use uber instead of their cars for instance !). Take this idea in consideration is part of the challenge !

Therefore, the 4.0 Industry gives two main values for companies :
  • Lower costs and predictive maintenance
  • Improvement of process quality (by using cognitives services that aggregates unstructured and structured datas). For instance, the sound is something becoming more and more important and there are lots of opportunities to explore.
In a way, this mix between IoT and Artificial Intelligence offers a computer science solution in addition with the Lean Management. We can take examples from the Edge AI (e.g. when we get AI directly on devices), which allows us to get better results than the combination Machine Learning - Cloud. Yet we can also take inspiration in the Asset Intelligence which allows us to focus on real industry expert instead of meaningless datas.

The success of industrial projects using those kind of unexpected technologies, is based, once again, on how clearly use cases are defined. The idea is to know exactly to which question we need to answer (through KPI). Also, it’s vital not to forget the human factor. Because bringing Artificial Intelligence (and IoT) in industry is a sensitive task which requires specific attention on a Human and Social aspect (to give a concret example : it needs to be explained to the staff properly, otherwise, the human factor will lead to the reject of the technology which can result in a complete failure for the entire project).

2. AI & IoT : it’s a match !


The Artificial Intelligence is a smart way to revolutionize every business. Not only it can bring more autonomy in connected objects process, but it will mostly give them the ability to adapt themselves to situations with no human interventions.

I believe that the couple AI - IoT can change our lives because their are opening new opportunities : we are now able to solve (previously unsolvable) problems with Artificial Intelligence. We are already seeing it in fields were AI was not expected : construction of aircrafts, fridges, tractors, and so on… Those successful examples happened with a good collaboration between customers and developpers.

The main goal of IoT here, is to provide to Artificial Intelligence good datas. By “good datas” I mean : a qualitative data that can be potentially usefull now or in the future. On a technical perspective, sensors are smaller every day and can retrieve more and more datas. Therefore, the question is not “What information can I get ?” but “How can I get this information”. Thus, we only need to focus on the data management (storage, cleaning, …).

In any project, it is clear that the data is very valuable because it helps algorithms/AI to understand specific scenarios. But to obtain sustainable results, we need to be sure that our datas doesn’t provide too much bias, which is very difficult and can lead to unexpected costs.

3. AI & Medical, is the new sexy !


In a different context, the medical field interests me since the beginning of my new project. Nowadays, integrating Artificial Intelligence to that field can seem quite difficult considering the current political and ethical climate. But it’s also a domain that inpires a lot ! A lot of little (r)evolutions are on their way. We can classify medical innovations in 5 technological groups :
  • The telemedecine (Artificial Intelligence prescribing medications, medical web forums, …)
  • The Big Data use (Which gives a better understanding of the patient and his environment)
  • The augmented reality
  • The augmented patient (with an artificial heart for instance)
  • The augmented surgeon (example)
Those fields are encouraging for the improvement of cares. For instance, human relations can be an obstacle to the diagnosis just because the patient doesn’t use the same vocabulary as the doctor. Also, doctors and nurses can be overwhelmed in their duty. We can find many other problems that shrink patient cares services !

As a response to all those issues, a first idea is to try to use datas in combination with Artificial intelligence (through Machine Learning and Data Science). If this solution is quite “basic” and common, it can surely improve the doctor’s listening time, which will lead the domain to a more human direction. 

Conclusion


I will say that we already are in a self-appropriation process with Artificial Intelligence, and it is no longer an utopian subject. There are more and more intelligent systems around us (Siri, Self-Drive Cars, Machine Learning marketing process, …). But in the end, those programs need to be a smarter mix between intrustion and the interest it brings in our lives. Indeed, the integration of Artificial Intelligence in our products/services is a quite sensitive aspect that we need to focus on.

IoT and Artificial Intelligence are a great match together, but it surely raises more and more difficulties that we need to keep in mind if we want to bring more evolutions to our lives. 

Think Fast, Think Distributed !

Since I need to implement an Artificial Intelligence program to complete my next project, I decided, quite quickly, to turn myself towards Multi-Agent Systems.
Of course, I could go for Machine Learning and other connexionist possibilities. Those are possibilities that I do not exclude, but here is the thing : I want to achieve this project as soon as possible. I can not wait years to obtain enough data from devices to perform a Data Science model. Also, the main idea is to provide a system able to “manage” a possible important number of devices at the same time. To do so, I need a more solid approach then a statistic algorithm. Therefore, I opted for a Multi-Agent system.

What is a Multi-Agent System ?

The idea of a Multi-Agent System (MAS), is, like the name is suggesting it, to create a set of agents, to put them in a specific environment and to define their interactions amongst themselves or within the environment.
The entity that we call agent, is the major actor of our system. Despite appearances, an agent can be self-sufficient or not. (Keep in mind that the agent can be a robot, a process, or even a human ! This is the global system that matters.)
MAS has already prove it efficacity in the modelling of Collective and Distributed Intelligence : this field is directly inspired by studies of social behaviors and Bio-Inspired Systems (like ants or bees).

Why should I distribute the Intelligence ?

If we speak about intelligence, it is quite easy to end up talking about knowledge. Following this notion, how do we inject knowledge in a simple program ? Different ways have proved their worth using for example the semantics of the knowledge.
The distribution of the intelligence is made through the creation of a social organization inside the system. This lies on the idea that knowledge is not just cognitive, but also social
Therefore, distribute intelligence gives two main advantages :
  • It gives the system a kind of multi-expertise aspect that can resolve problems through various means.
  • It allows the system to deconstruct a big problem into several little ones that will be resolved in parallel. This makes the resolution easier in addition to makes it faster.

The real application

Since my project is to put intelligence in a medical device network, I want to incorporate a distributed intelligence for reasons explain above. More precisely, I want to include a Distributed Contraint Optimization Problem (DCOP).
This DCOP choice is quite simple.
Every device within the hospital’s network is connected to a patient (or a room) and add series of specific constraints to the system. The intelligent way to think here, is to detect every room in the medical service that needs an intervention, and then prioritize them (to define which intervention is more important). To do so, the system will include an agent for each room. Each agent will focus on the question “should I call the nurse ?” and will take a decision on its own. Then, all agents of the system will communicate with each other in order to optimize their decision (“should we call the nurse together to limit her moves ?”, “should I wait before calling here since you are in more critical state then me ?”, [and so on …]). Conditions to satisfy are defined as mathematical constraints. That way, the problem can be brought back to a classic constraint optimization problem.


A Pleasant Way To End Up A Double Degree

Almost a year ago, I took the risk to begin a new Artificial Intelligence degree while finishing my Computer Science Engineering one. Not only it was a challenge for me, but it was also an opportunity for me to get closer to this innovative field.
After hard work and no regrets, I end up starting my final internship for VISEO Technologies in Lyon (France). Today, the company (should I say Vincent ?), is giving me the opportunity to challenge myself on an innovative project mixing IoT and Artificial Intelligence.
The idea of this project is to create an intelligent computer system able to manage medical eletronic devices in a hospital departement. More specificly, I focus my study on the simplest devices (like a syringe pump).

But, For What Purpose ?

A nurse can spend between 5 and 10% of her day managing those devices. This is a really huge amount of time since a single patient can use up to 7 syringe pump at the same time (!). Every device is configured to work for a specific time depending on its function, on the patient’s condition, … .  The nurse’s job is then to check and refill those devices periodically.
When one of those devices malfunction or if has almost finish its program, it produces a really loud sound in the patient’s room in order to call the nurse for intervention.
Devices sound really often and can then stress them and stress the patient who’s resting. Besides, the nurse needs to come over the patient’s room, notices what is wrong with the device, and sometimes go fetch some medicine in another room and then comes back in the room. This is amplified by the lack of a centralisation system for devices informations (about their states, about the end of their program, and so on…).
Therefore, the main purpose of my project is to combine all the devices informations (and Artificial Intelligence) in order to warn nurses about futur actions.

Do You Really Need Artificial Intelligence For That ?

I think it is just the right approch.
Indeed, those kind of devices are full of underused data just waiting to help nurses in their job ! The Artificial Intelligence will help us to achieve two main goals :
  • First things first, the AI can manage a huge amount of data in addition to be really fast in decision making.
  • Second point, I have a good feeling on the idea that a system like that will be easily improved and complexified (which could lead us to a really powerful system).

So, What’s Next Step ?

After a month of work, I have a better vision of the project But I still need to keep myself updated about what is happening on the Artificial Intelligence planet, but also in IoT (which is not my strenght, for now).
I am really excited about this new mission, that I intend to accomplish ! To do so, I am working in collaboration with M. Vincent THAVONEKHAM in VISEO, M. Samir AKNINE and M. Huan VU who both are researchers in the LIRIS. My goal for now is to find the best AI solution (i.e : the algorithm) to solve this problem and find an optimal way to use it.


Improve the Configuration of Docker Compose with Environment Variables

I recently started working on a new python project (yeah!). This project is really interesting, but the first lines of code are at least a d...